Some nice 2011 G650 GS footage. Looks like a nice bike! Wonder if that bodywork would fit on my bike…
Categories
Some nice 2011 G650 GS footage. Looks like a nice bike! Wonder if that bodywork would fit on my bike…
I went on a really fun ride this morning with my friend Chris around the Hill Country. Put on 202 miles and when I pulled into the garage, the odometer was at 7,001!
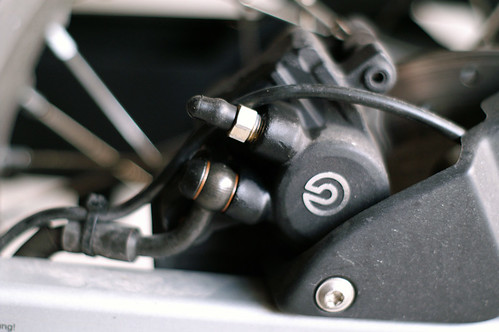
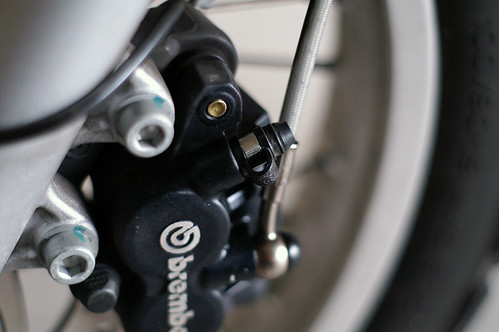
Today I changed the brake fluid on my GS. The speedometer is at 6, 772, so it was a little overdue. I think this is the first time it was changed. The old fluid was looking dark in the reservoir, that’s for sure!
With the stock bleeder screws, this would be a two-person operation, where one person would loosen the valve, then the second person would squeeze the brake lever, then the first person would tighten the valve so no air would go back into the system when the brake lever is released. I figured I’d be changing the brake fluid often so I bought a pair of “Speedbleeders“. These are replacement bleeder screws which have a one way valve which won’t let any air back into the system when you release the brake.
Before I could do that, however, I had to change out the stock bleeder screws with the new Speedbleeders. This was pretty easy just using an 11mm wrench. When you are doing this, some of the old fluid is going to come out so it’s best to have some rags or paper towels on hand and maybe put some cardboard on the ground. Brake fluid supposedly eats through paint, so be careful not to get it on any painted parts. I also wore some rubber gloves that I had leftover from when I used to work on the Supercub. Another tip is to not open up the brake fluid reservoir until after you are done replacing the bleeder screws so that there is at least some vacuum pressure keeping the fluid from free-flowing out.
Unscrew the old bleeder screw, then screw the Speedbleed in by hand to make sure you are threading it correctly. Then use the wrench to tighten it all the way down until it seats. There’s some sealing material on the threads, so it will take a little muscle to screw them in. Don’t over-tighten them, however!
Once the new Speedbleeders are installed, it’s time to bleed those brakes! You’ll need to have some rubber tubing and a receptacle for the old fluid. I purchased these from Speedbleeder.com for several bucks. It looks like an IV bag that you’d see at the hospital. I put the bag in a bottle just to keep it upright during the process. Attach the tube to the Speedbleeder nipple, then unscrew Speedbleeder about a quarter to a half turn. At this point I opened the brake fluid reservoir and started pumping the brake lever. The old brake fluid will come through the tube and into the bag. Pump it slowly a few times and keep an eye on the reservoir. Make sure to fill it up with the new brake fluid when it gets low. Don’t let the level go into the tube. So just pump and fill until the fluid coming out the Speedbleeder and into the baggie is a nice clear color and you don’t see any air bubbles. This might take a while. Once that is done, tighten the Speedbleeder screw, remove the plastic tubing, and make sure you fill the reservoir up to the correct level. Close up the reservoir and try out the new (hopefully firmer) brake action.
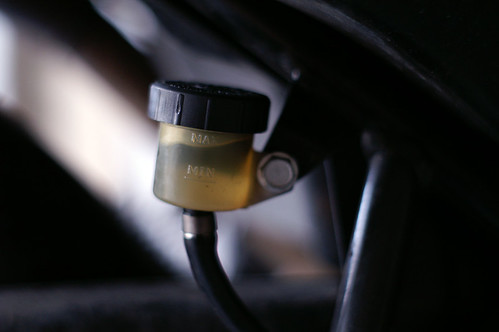
Nice, new brake fluid in the rear reservoir
Lastly, you can put the little covers over the Speedbleeder nipple. The one they provide is really cheap, so I used the old stock BMW covers which have a retaining ring. By the way, you can put this on after the operation is done since the retaining ring is stretchy enough to go over the bolt.
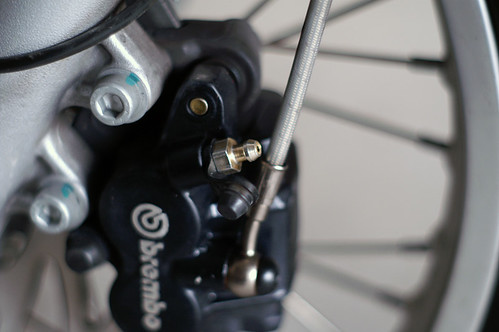
New front Speedbleeder with cap (off)
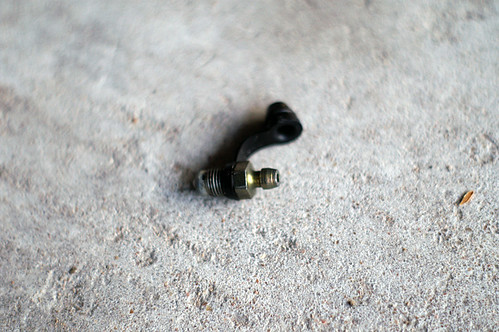
Old BMW bleeder screw
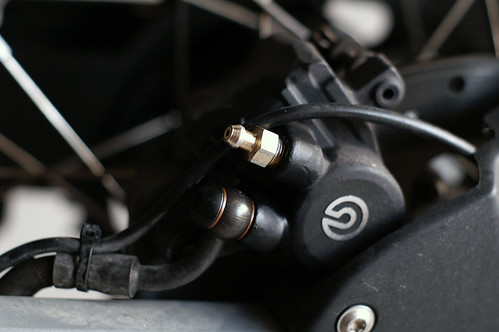
The shiny new Speedbleeder on the rear
The cheap nipple cap that came with the kit
With the old BMW cap back on
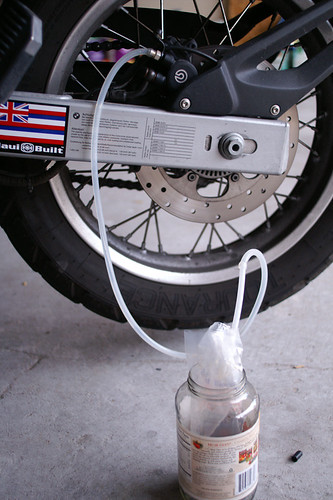
The tube leading to the receptacle
Simon and Lisa Thomas (2RideTheWorld) riding their BMW motorcycles around the globe. Fantastic!
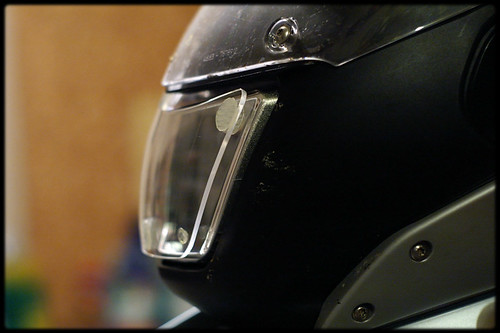
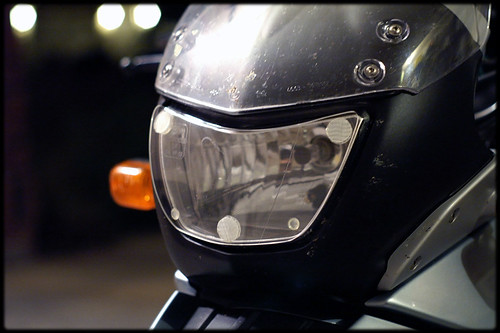
I bought a Cee Bailey’s headlight guard the other day. It’s a simple clear shield that attaches using some really strong 3M velcro. The cost of a new headlight for the BMW is outrageous, so this protection could potentially save me a big expense.
Blondes on Bikes Ep1 – Part 1 – Eurotrip from tmotten on Vimeo.
I really enjoyed this video ride report. Taco and Marse take a trip from Dublin to Vladivostok. Also check out their blog. It’s great!
Cool video.

I picked up a new Summer jacket from Lonestar BMW/Triumph yesterday: a Rev’it! Air mesh jacket in the grey color. It was on sale at 25% off and I just couldn’t pass it up. The S size fits me perfectly and because I have Rev’it! pants as well, they zip together at the lower back. I really like the look of the Air and it’s got decent protection in the elbows and shoulders and the pad for the back can be replaced with stronger armor, which I might do before Summer rolls around. The large mesh area on the front should keep me cool in the Texas heat. Until then, I’ll use my old jacket, which has really good wind protection and plenty of room underneath for layers of warmer clothes.
My friend Colin riding along on his motorcycle. Nice tunes too.
Cool vid of two 650 Dakars in the desert.