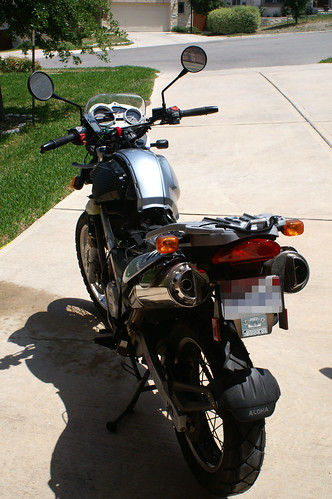
Another day of routine maintenance on the bike. This time it’s a coolant change. Looked like it would be a super easy job. It turns out it was simple, but a little frustrating at one point. The F650 GS takes the normal 50/50 antifreeze coolant so it’s a really cheap bit of work. The only other thing you need to buy is a small copper crush washer, size A6X10. I just ordered a few from Lonestar BMW for 40 cents each. I also bought a funnel that had some marks on the side of it so I would know exactly how much antifreeze I was putting in. It turns out this funnel is unnecessary so I will be returning it.
First, you need to start with a cold bike. Then, remove the left-side faux tank cover so you have access to the radiator cap and reservoir tank. Next, unscrew the radiator cap and remove the reservoir cover. After that, loosen the drain plug at the bottom of the water pump cover. Make sure you have some kind of container to catch the old coolant. I used an old water jug and a big funnel. When taking out the drain plug (and washer) make sure not to drop it into the old coolant. You’ll also need to disconnect the radiator hose to get the fluid out of the radiator. Lastly, remove the reservoir and dump the old coolant that was in there. Reattach the hose, put a new crush washer on the drainplug, apply a little loctite, then tighten it back up.
Next I wanted to bleed the cooling system and to do this, you are supposed to attach a tube to the bleed valve, then loosen it and start adding coolant to the radiator. Any air in the system will be forced out and when you see a steady stream of coolant coming out, tighten the bleed valve. The problem I had was that I couldn’t for the life of me find the bleed valve. I had a photo from f650.com and also the photo from the official service manual. I must have spent 20 minutes searching! Well, it turns out that the twin-spark F650 GS’s do not have a bleed valve, but just a regular bolt instead. This makes bleeding the cooling system a little trickier. Since you can’t attach a tube, I ended up sticking a straw into the hole. Positioned under the other side of the straw was the water jug and funnel. I started adding fluid to the radiator, and when I saw fresh coolant coming out of the straw, I quickly popped the bold back in there. It was a little messy and I’m not sure a little air didn’t get back in there, but what are you gonna do?
Next I topped up the radiator with coolant, and put some in the reservoir to the MIN line. I put the radiator and reservoir caps back on, then started up the bike. After about 10 minutes the fan kicked in which meant it was warmed up. Then I let it cool down and unscrewed the radiator cap and topped it up again. I also filled the reservoir to the max level. I put the plastics back on the bike, and was done! Later on I went for a ride and then checked the coolant level again, but it was the same level.
This was my first coolant change, and they recommend you change it every 2,000 miles so I was well overdue. It’s an easy and quick procedure, so I will be doing ti following the recommended schedule! Next maintenance that I would like to do is a valve check. This will be a little more involved, but I’d rather do it myself since service at the dealer is crazy expensive!
2 replies on “Maintenance Day – Changing the Coolant”
How did you get the radiator cap off? I can’t push down hard enough to get it past the last tab stops
It was on there pretty tightly. It seemed like it was stuck but I pushed down pretty hard and turned and it finally came off.